Category Archives: Cookies

Lemon Macarons with Lemon Cream

It’s been over a week since I’ve made macs and I’m going through withdrawal.   I thought I’d brighten things up with some zesty lemon macarons, sandwiched with a lemon cream filling.  I’m still playing around with my mac recipes, the proportions of ingredients, the temp, the sizes, the baking times, the aging of the egg whites.  Some days none of those things seem to matter and some days they all do.  Aaaaargh!   Alas, this is why I love these challenging darlings!

Lemon Macarons with Lemon Cream
makes about 40 2” sandwiched macarons

Click here to print this recipe

5.8 oz almond flour
5.8 oz powdered sugar
pinch salt
4.4 oz egg whites
¼ t cream of tartar
5.8 oz sugar
zest from one lemon
a few drops yellow food coloring

Combine almond flour, powdered sugar and salt in bowl of food processor and pulse to blend.  Sift and place in a big bowl.  Place egg whites in mixer bowl with cream of tartar and begin whipping to soft peaks.  Meanwhile, place sugar (along with about 2 oz water), zest and food coloring in a small saucepan and heat over medium-high until the syrup reaches the soft-ball stage (approximately 235°F).

Immediately pour sugar syrup over beating egg whites and turn up the speed to high.  Continue whipping until just warm.  Place the meringue in the middle of the bowl containing the dry ingredients and stir to combine.  Use long “J folds” to get all of the remaining dry ingredients incorporated.  Pipe using a decorating bag onto a parchment-lined baking sheet.  Rest up to 30-60 minutes to allow macaron shells to form a skin.  Bake in 325°F oven for about 13-16 minutes depending on size.  (Once the feet have formed around 6 minutes, open the oven to allow steam to escape, rotate pans at this time.)  Sandwich cookies with lemon cream when cool.

Lemon Cream
makes about a pint

Combine 1 egg, 1 yolk and ½ cup sugar and whip until doubled in volume.  Scrape into a small saucepan; add 2 oz lemon juice and the zest from one lemon.  Cook over medium until the mixture thickens.  Scrape into a small bowl, cover the surface with plastic wrap and refrigerate until cool.  Whip 1 stick butter until softened, then add lemon cream custard, whisk until homogeneous.

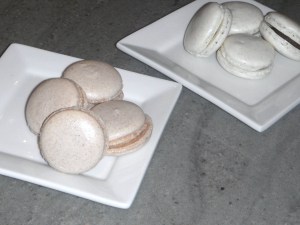
Autumn Macs – Vanilla Bean with Pumpkin Butter and Cinnamon with Pear Cream

I designed today’s baking experiment around making autumn macs that were NOT filled with buttercream.  I’ve had a lot of success filling my recent macarons with buttercream, but I just wanted to try something different.  My first batch today are cinnamon macarons filled with a unique filling called Pear Cream, which is basically a custard mixed with cooked/pureed pears. A splash of pear brandy is added to bring out the flavor and then the custard is blended with butter to give the filling some creaminess.

Todd suggested pairing the filling with cocoa macarons, but he’s out of town and I’m not sure how I feel about chocolate and pear together…So, I decided to make cinnamon macaron shells.  I used a basic recipe to which I added about 2 T of ground cinnamon.

Before I share the pear cream recipe, I would like to take a few moments to talk about custards. Simply and scientifically put, a custard is a liquid thickened or set by the coagulation of an egg product. Doesn’t that sound delicious?? Ha ha. Seriously, there are 2 types of custards, a stirred custard (which is stirred over heat and remains pourable) or a baked custard (which sets as it bakes). The basic rule for any custards is that the internal temperature should never get over 185 F. This is the temperature at which the mixture coagulates and, beyond that, it will curdle. So, what this means is that stirred custards should always be stirred or whisked while being heated and baked custards are baked at a moderate temperature, usually with the use of a water bath to regulate heat distribution. Some examples of custards include creme brulee, bread pudding, creme caramel, cheesecake, quiche and ice cream.

Continue reading

Some really awesome cookies

So, if the title doesn’t give it away, what follows here is a recipe for some really awesome cookies! If you are a cookie person and don’t already own Carole Walter’s Great Cookies, please do go out and get a copy. You can buy it off Amazon right now for about 20 bucks. It’s the best cookie book out there!!

Anyway, cookies were on the menu on Friday since I found out that I have a nephew who is on the mend and I decided I needed to send him a little care package. These really awesome cookies are easy to make, use ingredients I already have, travel and store well and are AWESOME!

Most people are pretty familiar with how a basic cookie recipe comes together, but this one uses a few alternate ingredients that I’d like to take some time to explain.

One of the first steps for making a cookie is usually the creaming step. Butter is whipped until soft and then sugar(s) mixed in, edges scraped down and mixture continued to be whipped until “light and fluffy.” This recipe, however, uses brown sugar in addition to regular sugar, and it also calls for a small amount of corn syrup. Brown sugar is a less refined sugar than granulated sugar and usually contains molasses. The molasses contributes not only to the distinct flavor of brown sugar, but also to its more hygroscopic nature. Brown sugar contains about 35% more moisture than granulated sugar. Hygroscopic means that it absorbs or attracts moisture. So, when brown sugar is added to a recipe, it serves to allow the cookies to be chewier, even after they have been cooled. The darker the brown sugar (i.e. dark brown sugar), the higher the molasses content. The extra addition of corn syrup in this recipe helps to give the surface of the cookies a little bit of a shine and it browns at a lower temperature than regular sugar. It is also part of the liquid in this recipe, and contributes to the moisture of the cookie while limiting its spread.

Finally, Carole’s recipe incorporates oatmeal in 2 forms, the whole oats that are actually mixed in to the recipe, but there is also a little over a cup of oats that are ground in the food processor and mixed in with the sugar during creaming. This seriously limits the spread potential of these cookies, since the oatmeal binds the dough. This counteracts (in a good way) the impact of the added moisture from the brown sugar, leaving you with a cookie that is magically thick and chewy. On with the recipe…

Chocolate Chip Oatmeal Cookies
(by Carole Walter)
makes 3 dozen cookies

3/4 c lightly packed brown sugar
2.5 c old fashioned oats, divided
1/3 c sugar
1.25 c flour
3/4 t salt
1/2 t baking soda
8 oz butter, slightly softened
2 T light corn syrup
1 egg
2 t vanilla
2 c semisweet chocolate chips
2 c chopped walnuts (optional)

Heat oven to 375 F and prepare parchment-paper lined sheet pans for baking. Grind brown sugar, 1/2 of the oats and the regular sugar in a food processor and process for 3 minutes until finely ground and powdery. In another bowl, sift or whisk together the flour, salt and baking soda. Stir in the remaining oats and set aside. Cream the butter and corn syrup in the bowl of an electric mixer on medium, until smooth and lightened in color. Add the oat-sugar mixture in 3 additions and mix well. Add the egg and vanilla and mix for another minute. Add the dry ingredients on low in three additions, mixing just until blended. Mix in the chips and walnuts by hand. Drop golf-ball sized mounds of dough on your cookie sheet, allowing a couple inches between to allow for spreading.

Bake for 10-12 minutes and rotate pans halfway through. Remove from oven when the edges are just beginning to brown, and allow to cool 2 minutes on the pan then move to a cooling rack. Try not to eat them all in one sitting. YUMMY!

Pecan Pumpkin Macs

I have started calling macarons “macs” in conversation with Todd.  It just makes things easier, plus I think it sounds cool.  And, yes, that means that I do have conversations with Todd about macs…

I made some macs using ground pecans instead of almonds and let me tell you, the flavor was amazing.  But it wasn’t easy!  Pecans are a much oilier nut than almonds, plus I have the luxury of being able to buy ground almonds (almond meal) and with pecans, I had to make it myself.

Pecan Macarons (adapted from Les Petits Macarons)
Makes about 40 1” sandwiched macarons

About 1.5 c whole pecans (to make 5.8 oz ground pecans)
5.8 oz powdered sugar
Pinch of salt
4.1 oz egg whites
½ t cream of tartar
5.3 oz sugar

Coarsely chop the nuts and place in your food processor.  Pulse for 3 second intervals, stopping about every 4 times to scrape the sides of the bowl.  This helps to keep the nuts from getting sticky or turning into a paste.  Pulse a total of about 20-30 times.  (I did 20 and they were starting to turn into a paste, so I stopped.)  Don’t wash your food processor bowl, because you are going to use it again soon and you don’t want it to be wet at all. Sift the nuts (if you’d like, my sieve was too fine) onto a parchment paper-lined baking sheet and bake at 200 F for about 30 minutes to dry out.  Cool completely, and then combine with powdered sugar and salt in the food processor and pulse to combine.  Remove and place in a large bowl and set aside.

Whisk the cream of tartar and egg whites to soft peaks in your mixer bowl.  While the whites are whipping, combine sugar with 2 oz water in a medium saucepan and heat to 235 F.  You may need to stir initially to combine, but once the syrup is boiling, it will stir itself.  Use a pastry brush dipped in ice water to wash down the sides of the saucepan if crystals are forming.  (Sugar crystals can quickly form a network and ruin your sugar syrup, so it is definitely necessary to wash them down if you see any.)

When the syrup is at 235 F and the whites are at soft peaks, quickly and carefully pour the hot sugar syrup down the side of the bowl into the whipping egg whites.  I’ve also written before that you can turn the mixer off, dump the syrup in and immediately begin whipping again at high speed.  Doesn’t matter which way you do it, but you want to be quick to avoid cooking the egg whites and be careful not to let hot syrup hit the moving whisk so that it doesn’t go everywhere!  Whip the meringue until it cools slightly and is glossy and stiff.  Spoon the meringue into the center of the dry ingredients and fold to incorporate.  Remember that the final product should look like hot, flowing magma!

Put the batter into a bag and pipe uniform size shells on parchment-lined baking sheets.  (See the picture below where I show the template I used for these batches.)

Don’t forget to double-stack your baking pans.  If you’ve read previous posts, you know I’ve had success baking in my oven at 325 F for about 14 minutes.  The author of this recipe, however, recommends baking at 200 F for 15 minutes then increasing the temperature to 350 F and bake another 9 minutes.  So, I tried it.  There could not be a better way to know that each person needs to get to know their own oven when baking macs!  After 10 minutes or so at the low temperature, my macarons were exploding in the oven, although I did notice a foot.  I immediately turned the oven up to 350 F and attempted to correct the process by increasing the heat.  Although the first batch of macs tasted great, they weren’t very pretty.

I baked a second batch, for 14 minutes at 325 F and they came out beautifully!

This recipe calls for the addition of cream of tartar, an ingredient I haven’t used previously in my mac recipes (although I am very familiar with its use in meringues).  Cream of tartar is known chemically as postassium bitartrate.  It serves to stabilize egg whites and allows them better tolerance of higher temperatures, as well as bigger volume.

Pumpkin-Bourbon Buttercream
Makes a little over a pint

To one pint of Italian Meringue Buttercream (outlined previously here), add the following ingredients:

1 T bourbon
1 c pumpkin puree
1 t cinnamon
1 t ground ginger
½ t grated nutmeg
¼ t ground cloves

Whip with whisk until emulsified.  If the mixture appears grainy and not smooth, it’s not yet emulsified.  Often, you can get it there by turning up the speed of the mixer or by slightly warming the bottom of your mixing bowl.  If those things don’t work, you can always add more butter, 1 T at a time.

Whoopie for Pumpkin!

I’ve always liked whoopie pies.  I’ve pretty much always liked dessert sandwiches period.  Ice cream sandwiches, cookie sandwiches and by now you know I’m somewhat obsessed with the French macarons, another dessert sandwich!  Let’s get real, it’s just a good idea…. Good stuff squeezed between more good stuff.  Yum.

I always enjoy baking with the seasons and my son, Josh, actually decided on pumpkin when we were at the grocery store.  He pointed and said “pumpkin.”  They had carving pumpkins, but also some cute (read: littler) pie pumpkins.  I adore anything littler than it’s regular size counterpart… So, I brought the baby pumpkin home.

To roast your own pumpkin (highly recommended, but very understandable to buy canned pumpkin), first rinse well, cut off the top near the stem, then cut it in half.  Use a big spoon to scrape out the seeds and pumpkin “innards.”  If you are so inclined, save them so you can roast the seeds.  (Yummy with salt!)  Cut each half into thirds and place them cut side down on a sheet pan.  Roast in the oven at 350 F for about 45 minutes.

It’s not necessary to peel the pumpkin, once it’s roasted the skin will start wrinkling up and trying to come off anyway.  It’s not easy to peel a raw pumpkin, so I always wonder why people want to do that before roasting!

Once the flesh is tender, remove from the oven and allow the pumpkin pieces to cool a bit in the pan.  Then peel the skin, using a peeler for any stubborn patches that remain.  Puree the pieces in your food processor until smooth.  You can use immediately or freeze in well-sealed plastic baggies for about 6 months or so.

Pumpkin Whoopies (from A Cozy Kitchen)
makes about 12 whoopie pies

12.5 oz flour
1 t baking powder
1 t baking soda
1/2 t cardamon
1 1/2 t cinnamon
1/4 t nutmeg (I really like to freshly grind my own)
1/2 t salt
4 oz butter, softened

1 c sugar
1/2 c brown sugar
1 egg
1 t vanilla
1 c pumpkin puree

Whisk dry ingredients together in a bowl and set aside.  Cream butter with sugars until light and fluffy.  Mix in egg, then pumpkin and vanilla.  Mix in the dry ingredients by hand to be sure you don’t overmix. These cookies should be soft, almost like cake, so you don’t want to develop too much gluten.  When you can still see just a little flour in the bowl, that means you are almost done mixing.

Drop scoopfuls on your parchment-lined baking pan, allowing a couple of inches in between each to allow for spread.  Bake at 350 F for about 15 minutes.  Remove when still soft (cake-like) and cool on a rack.

Cream Cheese Icing

2 oz butter, softened
4 oz cream cheese, softened
1 c sifted powdered sugar
1/2 t vanilla

Beat cream cheese and butter together until smooth with no lumps.  Sift in powdered sugar, then beat until smooth again, scraping sides if necessary.  Beat in the vanilla.

Spread half of the cookies with icing, then sandwich with the other half.  If you happen to have a leftover cookie without a mate (I did!), I recommend dragging it as best you can through the remaining icing in the bowl.

Definitely Delicious! Happy Fall!